Learn how to change garage door springs safely and effectively with expert tips. Discover when to DIY, when to call a pro, and how to ensure long-term garage door function.
Garage door springs help lift and lower the door by balancing its weight. Over time, they wear out, so it’s essential to know how to replace them to keep the door working correctly.
Whether you’re dealing with torsion or extension springs, the replacement process involves specific tools, accurate measurement, and proper tensioning. It’s not just a technical task, but also one that carries safety risks if done incorrectly. That’s why homeowners must approach this repair with informed caution.

This guide outlines how to change garage door springs with detailed steps, safety precautions, and expert recommendations. It also includes tips to identify the right type of spring, avoid mistakes, and ensure your door operates reliably after the replacement. We’ll also explain when it’s better to rely on a professional.
Safety Tips Before You Start Replacing Garage Door Springs
Working with garage door springs can be dangerous due to the high tension they’re under. Before attempting any repairs or replacements, it’s crucial to understand the risks involved and prepare accordingly. Use the following safety tips as a checklist to protect yourself and ensure the job goes as smoothly and safely as possible.
1. Identify the Type of Spring System You Have
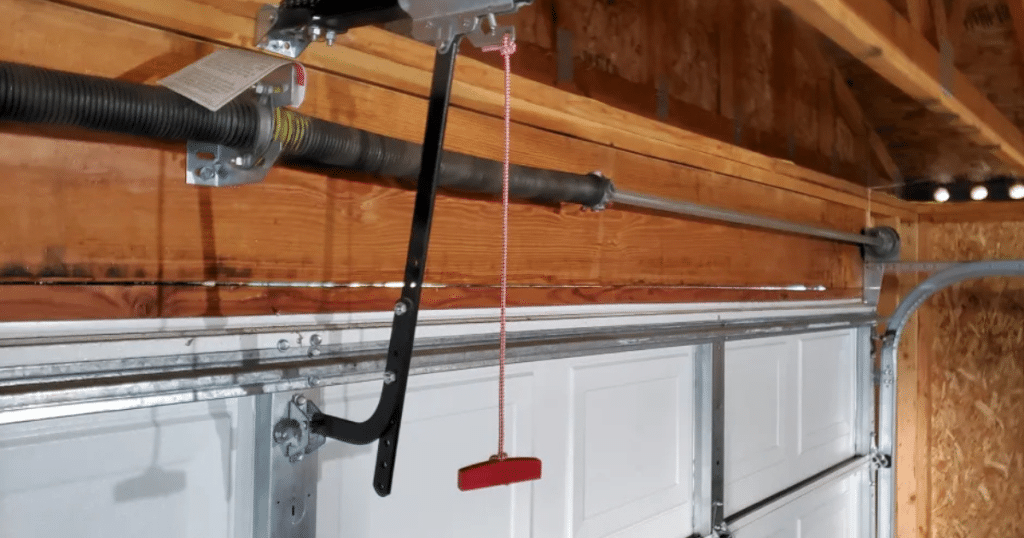
Before touching anything, determine the type of spring system your garage door uses. Most residential doors are equipped with either:
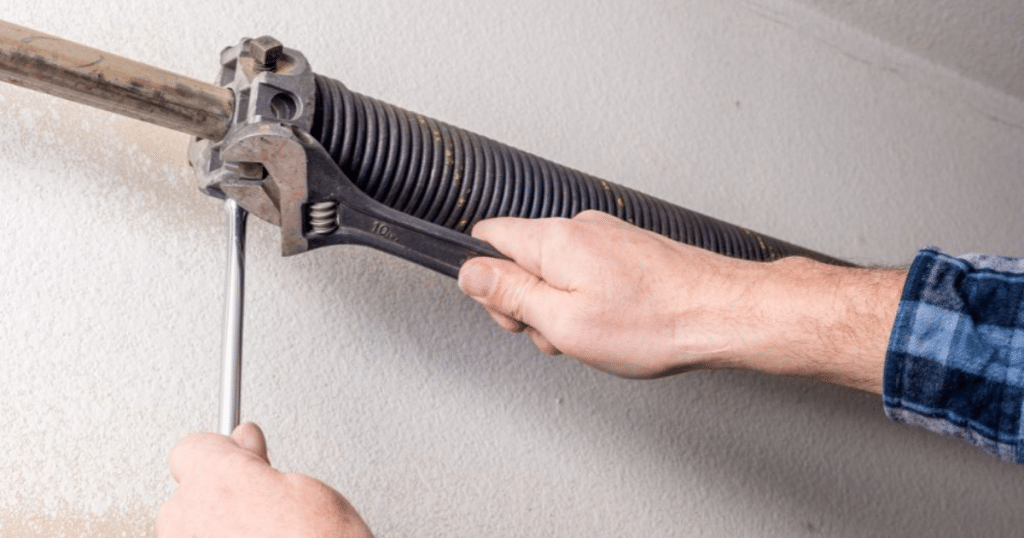
- Torsion Springs: These are mounted horizontally above the garage door opening and twist to provide lifting force. They’re generally more durable but also more dangerous to handle without proper training.
- Extension Springs: These are located on either side of the door, along the tracks. They stretch and contract to assist with lifting and lowering the door.
Each type requires a different replacement method and specific tools. Knowing which system you’re working with will help you follow the correct procedure and avoid serious injury or property damage.
2. Disconnect the Garage Door Opener and Secure the Door
Before you begin any hands-on work, unplug the automatic garage door opener. This eliminates the risk of the motor being activated accidentally while you’re working. Additionally, clamp the door shut using locking pliers or C-clamps placed on the tracks just above one of the rollers. This will prevent the door from lifting or falling unexpectedly, which can be extremely dangerous during spring replacement.
Never attempt to work on the springs when the door is open or under tension. Doing so could cause the door to slam shut or the spring to snap with significant force.
3. Wear Appropriate Safety Gear and Use Proper Tools
Garage door spring replacement is not a job for basic household tools. You’ll need:
- Protective eyewear to shield your eyes from any debris or snapped parts.
- Heavy-duty gloves to protect your hands from cuts, pinches, or sudden movement of the springs.
- Winding bars (specifically for torsion springs), not screwdrivers or other improvised tools. These are designed to safely handle the extreme torque.
- Socket wrenches and vice grips for loosening and securing parts.
Using improper tools or skipping safety gear can greatly increase the risk of injury. If you don’t have the right equipment or aren’t completely confident in your abilities, consider hiring a professional.
How to Change Garage Door Springs: Step-by-Step Instructions
Step 1: Measure the Existing Spring
Before removal, take accurate measurements of the spring, including length, inside diameter, and wire gauge. These specs are necessary for buying the correct replacement spring.
Step 2: Safely Release Spring Tension
For torsion springs, insert winding bars into the winding cone and slowly unwind the spring to release stored energy. For extension springs, disconnect the safety cables and pulley system carefully.
Step 3: Remove the Old Spring
Once tension is released, loosen and remove the spring from its mount. Be sure to keep track of any hardware that will be reused.
Step 4: Install the New Spring
Place the new spring into position and secure it with the appropriate brackets and fasteners. For torsion springs, wind them based on the number of turns recommended for your door size and weight.
Step 5: Check Tension and Balance
After installation, lift the door halfway to test its balance. If the door moves up or down on its own, the spring tension may need adjustment. A balanced door should stay in place when opened halfway.
Common Mistakes to Avoid When Replacing Springs

Replacing garage door springs is a precise and potentially hazardous task. A few common mistakes can lead to serious safety risks, reduce the lifespan of your garage door system, or cause costly damage. Here are the most frequent errors to avoid:
1. Using the Wrong Size or Type of Springs
Not all springs are created equal. Garage doors vary in size, weight, and design, which means they require specific springs with precise tension ratings. Installing springs that are too strong or too weak for your door can result in poor operation, noisy movement, or damage to the door and opener. Always double-check:
- Spring length and diameter
- Wire size
- Spring wind direction (for torsion springs)
Refer to the door manufacturer’s specifications or use a spring calculator to confirm you’re using the correct replacement.
2. Incorrect Winding or Tensioning
For torsion springs, especially, proper winding is critical. Applying too much or too little tension can cause the door to lift unevenly, slam shut, or not open at all. Always use calibrated winding bars, not makeshift tools like screwdrivers, and follow the manufacturer’s winding instructions precisely.
3. Skipping Essential Safety Precautions
Some DIYers overlook basic safety steps, such as disconnecting the opener, securing the door, or wearing protective gear. This can lead to serious injuries or even fatalities. Never assume a shortcut is worth the risk—safety should always be your top priority.
4. Forgetting to Check Door Balance After Installation
Once the springs are installed, it’s important to test the door’s balance. Raise the door halfway and let go—if it stays in place, it’s balanced. If it moves up or down on its own, the tension may need to be adjusted. An unbalanced door puts stress on the opener and shortens its lifespan.
5. Ignoring Warning Signs After Installation
If your door feels heavier than usual, moves unevenly, or makes unusual noises, stop using it immediately and consult a garage door technician. These could be signs of improper installation or hidden mechanical issues that could worsen over time.
Post-Replacement Maintenance Tips
Apply Lubrication Regularly
Use garage door lubricant to treat the new springs and other moving components. This reduces noise and prevents corrosion.
Inspect the Door System Monthly
Visually check cables, rollers, and tracks for wear. Early detection of problems helps maintain the overall performance of the system.
Schedule Annual Tune-Ups
Even with a successful replacement, professional inspections are recommended at least once a year to ensure safe operation.
Frequently Asked Questions
How expensive is it to replace garage door springs?
Replacing garage door springs typically costs between $150 and $350, including parts and labor. The exact cost depends on the type of spring (torsion or extension) and door size. DIY replacement may cost less, but it’s risky without the right tools and experience.
Should you replace both garage door springs at the same time?
Yes, it’s highly recommended to replace both springs together. When one spring breaks, the other is usually near the end of its life and may fail soon after. Replacing both ensures balanced operation and prevents additional service calls.
Can you open a garage door with a broken spring?
You can, but it’s difficult and potentially dangerous. The spring counterbalances the door’s weight, so without it, the opener or manual lifting requires much more force. It’s best to avoid using the door until the spring is professionally replaced.
How often should garage door springs be changed?
Garage door springs typically last 7–12 years or about 10,000 cycles (one open and close equals one cycle). Frequent use, temperature fluctuations, and lack of maintenance can shorten their lifespan. Regular inspection helps determine when replacement is needed.
How do I know if my garage door springs need to be replaced?
Signs include difficulty opening the door, uneven movement, or a loud snap when the spring breaks. You might also see visible wear or gaps in the spring coil. If the door feels unusually heavy or doesn’t stay open, the springs may be failing.
Conclusion
Learning how to change garage door springs is a valuable skill that can save you money and extend the life of your garage door system. By following this guide, you can approach the task with confidence and ensure a safer, more efficient door operation.
While DIY garage door spring replacement is possible, it’s crucial to prioritize safety. If you ever feel unsure, it’s best to consult a professional. Remember, improper handling of garage door springs can lead to serious injury or property damage.
If you’re in the Anna, TX area and prefer to leave this task to the experts, contact Anna’s Best Garage & Overhead Doors. Our experienced technicians provide reliable and affordable garage door spring replacement services tailored to your needs.
End Note
Anna’s Best Garage & Overhead Doors in Anna, TX, is your go-to local garage door service company. As the leading garage door service provider in Anna, TX, we take pride in offering top-quality repairs and installations. With years of experience and a deep understanding of our community’s needs, we ensure every job is done right the first time.
Our transparent pricing and excellent customer service set us apart. Whether you need spring replacement, opener repair, or a new garage door installation, we’re here to help. Explore our full range of services, learn more about us, check out our latest blog posts, or see the areas we serve. Ready to schedule a service? Contact us today or visit our homepage to get started!
Anna’s Best Garage & Overhead Doors
1009 Mathew Dr, Anna, TX 75409, United States
+14696942469
